You tried making hingagyi once.
And it smelled wrong. Or didn’t ferment at all. Or turned slimy halfway through.
Yeah. I’ve been there too.
Hingagyi isn’t just “Burmese fish sauce.” It’s fermented shrimp paste. Alive, pungent, deeply umami, and wildly regional.
I’ve made it over a dozen times. In open-air village yards under the sun. In my own kitchen with sealed jars and thermometer checks.
Some recipes tell you to “ferment for 2. 3 weeks” and call it done. That’s garbage. Timing depends on temperature, shrimp size, salt ratio, and humidity.
Get one wrong and you’ll waste three pounds of shrimp.
I’ve seen people toss entire batches because no one told them how to spot safe fermentation versus spoilage.
Or how much salt is actually enough (hint: most blogs use too little).
How to Make Hingagyi starts with knowing what real hingagyi smells like. Not just what it should smell like.
This guide walks you through every decision point. Not theory. Not shortcuts.
Just what works.
You’ll know when it’s ready. You’ll know when to stop. You’ll know how to fix it if it goes sideways.
No guessing. No Google panic at 10 p.m.
Just clear steps. Tested. Repeated.
Trusted.
Hingagyi Isn’t Fish Paste (It’s) Shrimp Ferment
Hingagyi is fermented ground shrimp. Not fish. Not anchovies.
Whole, headless shrimp only (salted,) pounded, and left to ferment.
I’ve tasted versions made with frozen shrimp. They smell like ammonia and never develop the right funk. Don’t do it.
It’s not ngapi (which can be fish or shrimp) and it’s nothing like Thai pla ra. Hingagyi is its own thing. Sharp, salty, deeply umami, and alive with bacteria that need real shrimp to thrive.
Rakhine-style hingagyi is coarse and salty. Fermented just 7. 10 days. Ayeyarwady riverbank versions are smoother, milder, aged 3. 4 weeks.
Shan highland hingagyi uses roasted rice powder and ferments longest. Up to 6 weeks (for) a deeper, earthier note.
Salt matters. Too little: spoilage. Too much: stalled fermentation.
Aim for 18 (25%) salt by weight. Shrimp should be 1.5 (2.5) cm long. Fresh ones gleam.
Pearly, not dull. No ice glaze. No preservatives.
Anchovies? Dried shrimp blends? They won’t ferment right.
Full stop.
You’ll see people call it “shrimp paste” and move on. That’s lazy. Hingagyi is specific.
It’s regional. It’s fragile.
If you want to get it right, this guide walks through every step (including) how to spot bad shrimp at the market.
How to Make Hingagyi starts with respect for the ingredient.
No shortcuts. No substitutions. Just shrimp, salt, time, and attention.
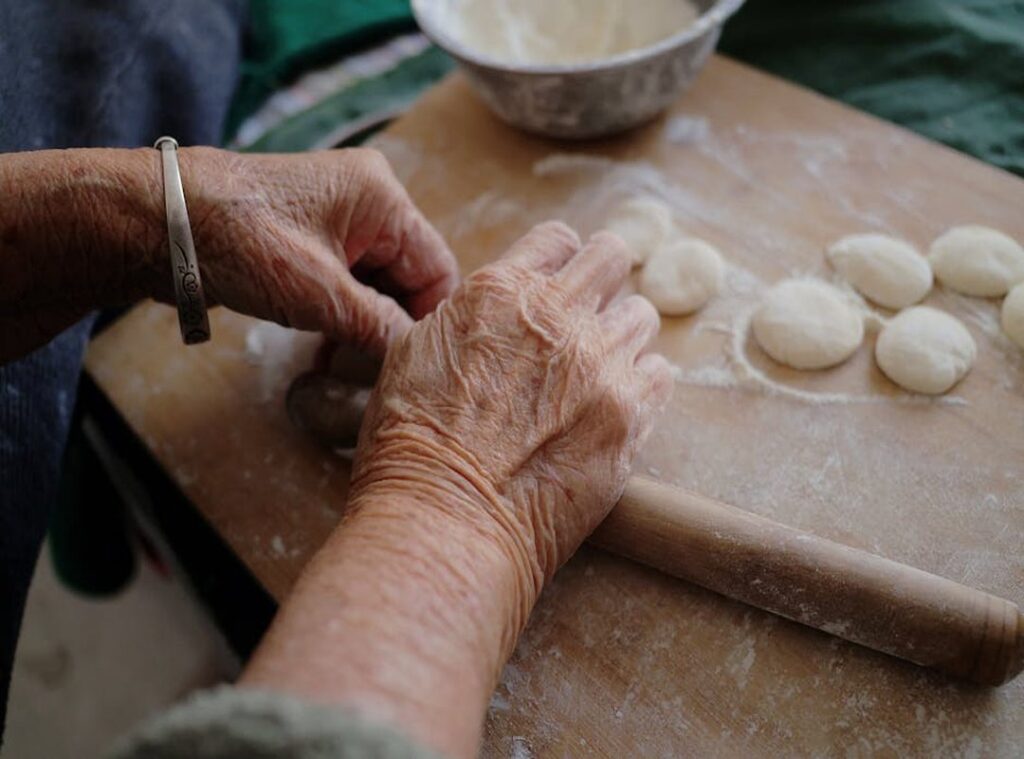
Prep Like You Mean It: Clean, Grind, Pack
I rinse the shrimp in cold water three times. No shortcuts. Cold water keeps them firm.
Warm water makes them mushy (and nobody wants mushy shrimp).
I drain them in a fine-mesh strainer for thirty minutes. Not twenty. Not forty.
Thirty. Set a timer. You’ll thank me later.
Then I pat them dry with a clean cotton cloth. Paper towels? Nope.
Lint sticks. Lint ruins texture. And lint is not fermenting.
I grind in small batches. Never more than 100g at a time. Mortar and pestle only.
Blenders heat the paste. Heat kills the microbes you need. Hingagyi lives or dies by those microbes.
Salt goes in by weight. Not volume. Not “a handful.” 22g per 100g shrimp.
I weigh it. Every time. Then I mix it in gradually while grinding.
Even distribution isn’t optional. It’s non-negotiable.
The jar? Wide-mouth glass or ceramic. Sterilized with boiling water.
Air-dried completely. No towel drying (moisture) hides in fibers.
I line the base with banana leaf or food-grade parchment. Banana leaf adds subtle flavor. Parchment works fine if you don’t have it.
Packing is methodical. Two-centimeter layers. Press each layer down hard with the pestle.
Tamp. Don’t just dump and hope.
Leave five centimeters of headspace. Gas has to escape. If you seal it tight, pressure builds.
Jars crack. Ferments fail.
Cover with another banana leaf. Lid goes on loosely. Not airtight.
Never airtight.
This is how you set up success (not) guesswork.
How to Make Hingagyi starts here. Not at day one of fermentation. At this prep.
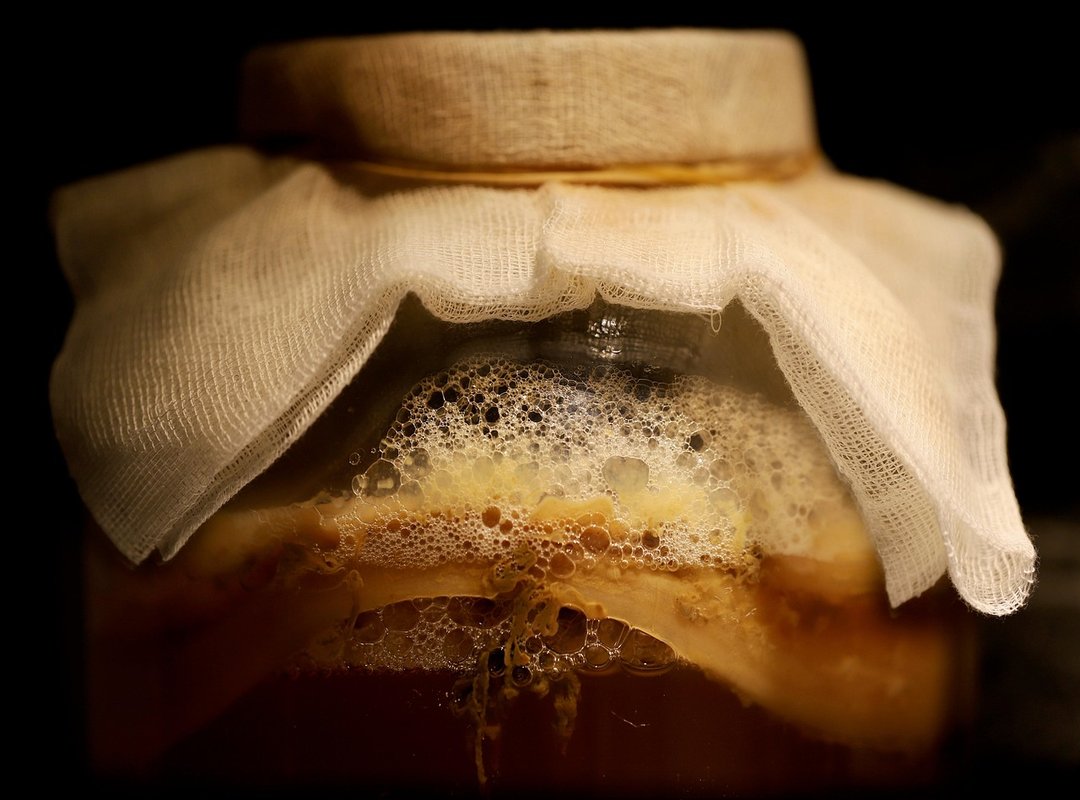
Hingagyi Fermentation: When to Walk Away and When to Wait
I made my first batch in a plastic tub. It grew fuzzy green on day 12. I ate it anyway.
Got sick. Not worth it.
Days 1. 7 are loud. Bubbling. Foaming.
A white film? Fine. That’s yeast doing its job.
(Not mold. Mold is fuzzy. Yeast is smooth.)
Days 8. 21 get quiet. Bubbling slows. Color shifts.
Pale tan to amber-brown. Smell deepens. You’ll know it when you smell it.
You can read more about this in Calories in Hingagyi.
Day 22+ is where magic happens. Surface dries slightly. Flavor rounds out.
Don’t rush this part. Patience isn’t virtue here. It’s necessity.
Ideal room temp? 28. 32°C. My kitchen hits 24°C in winter. So I use an insulated box + warm water bottle.
Works better than a heating pad (which can cook the culture).
Green or black mold? Toss it. No debate.
Sour vinegar smell? Over-fermented. But still usable in soups or stews.
Separation? Stir gently. Normal.
Test readiness like this: scoop a pea-sized amount. Dilute 1:4 with warm water. Taste.
Should be deeply savory, salty-sweet. No sharp bite. No bitterness.
I stir every 3 days in week one. Bamboo stick only. Metal kills microbes.
Plastic scratches and hides gunk.
You’re probably wondering: How to Make Hingagyi without wasting three weeks? Start small. Track temps.
Trust your nose more than the calendar.
Curious how much you’re actually eating? Check the Calories in Hingagyi page before portioning.
And if your batch smells like gym socks? Yeah. Toss it.
Hingagyi Storage, Uses, and Hard Truths
I store mine in a clean glass jar. After 21 days, I seal it tight and slide it into the fridge.
It lasts 12+ months. if the surface stays fully covered with oil or brine. No exceptions.
Drying out? Oxidation? That’s how you lose depth and pick up off-flavors.
(Yes, even in the fridge.)
Before sealing, I brush the top layer with neutral oil. Peanut or sesame works. Just a light coat.
Don’t skip this.
You’re not just preserving flavor. You’re protecting the fermentation.
Hingagyi isn’t just for dipping. Stir it into curry bases. Blend it into salad dressings.
Whisk it into noodle broths. Use it as an umami booster in vegetarian stews.
No fancy ratios needed (just) taste as you go.
New to hingagyi? Start here: 1 tsp hingagyi + 1 tbsp lime juice + 1 tsp palm sugar = balanced dipping sauce.
Freezing kills texture and messes with microbial balance. Don’t do it.
Reusing old jars without full sterilization? That’s how mold shows up uninvited.
Hingagyi Allkyhoops Burmese is the version I trust. Fermented right, stored right, used right.
How to Make Hingagyi starts with respect for time and temperature. Not shortcuts.
Your First Hingagyi Batch Starts Tonight
I’ve been there. Staring at salt and fish, scared to mess it up.
That fear? It’s real. Vague instructions ruin batches.
Dirty tools invite rot. Rushing kills flavor.
You now know the three things that cannot bend:
How to Make Hingagyi means nailing the salt ratio. It means scrubbing every jar, spoon, and surface. It means waiting (full) 21 days.
No peeking, no stirring, no panic.
You don’t need perfection. You need precision on those three points.
So do this tonight: gather your fish, salt, and jar.
Grind your first 100g batch tomorrow morning.
Mark Day 21 on your calendar (then) walk away.
Your hingagyi won’t taste like store-bought. It’ll taste like tradition, trust, and your own hands.